If you are doing it the first time, or just recently migrated to a new computer, you will need to generate SSH public keys and save it to your online repository (such as Github).
This post will explain how to generate SSH keys on MacOS computers.
Step 1: Open Terminal
First of all, you don’t need to download anything. Your Mac comes with OpenSSH suite which contains ssh-keygen utility.
Here is the usage of ssh-keygen
usage: ssh-keygen [-q] [-a rounds] [-b bits] [-C comment] [-f output_keyfile]
                  [-m format] [-N new_passphrase] [-O option]
                  [-t dsa | ecdsa | ecdsa-sk | ed25519 | ed25519-sk | rsa]
                  [-w provider] [-Z cipher]
       ssh-keygen -p [-a rounds] [-f keyfile] [-m format] [-N new_passphrase]
                   [-P old_passphrase] [-Z cipher]
       ssh-keygen -i [-f input_keyfile] [-m key_format]
       ssh-keygen -e [-f input_keyfile] [-m key_format]
       ssh-keygen -y [-f input_keyfile]
       ssh-keygen -c [-a rounds] [-C comment] [-f keyfile] [-P passphrase]
       ssh-keygen -l [-v] [-E fingerprint_hash] [-f input_keyfile]
       ssh-keygen -B [-f input_keyfile]
       ssh-keygen -D pkcs11
       ssh-keygen -F hostname [-lv] [-f known_hosts_file]
       ssh-keygen -H [-f known_hosts_file]
       ssh-keygen -K [-a rounds] [-w provider]
       ssh-keygen -R hostname [-f known_hosts_file]
       ssh-keygen -r hostname [-g] [-f input_keyfile]
       ssh-keygen -M generate [-O option] output_file
       ssh-keygen -M screen [-f input_file] [-O option] output_file
       ssh-keygen -I certificate_identity -s ca_key [-hU] [-D pkcs11_provider]
                  [-n principals] [-O option] [-V validity_interval]
                  [-z serial_number] file ...
       ssh-keygen -L [-f input_keyfile]
       ssh-keygen -A [-a rounds] [-f prefix_path]
       ssh-keygen -k -f krl_file [-u] [-s ca_public] [-z version_number]
                  file ...
       ssh-keygen -Q [-l] -f krl_file [file ...]
       ssh-keygen -Y find-principals -s signature_file -f allowed_signers_file
       ssh-keygen -Y match-principals -I signer_identity -f allowed_signers_file
       ssh-keygen -Y check-novalidate -n namespace -s signature_file
       ssh-keygen -Y sign -f key_file -n namespace file [-O option] ...
       ssh-keygen -Y verify -f allowed_signers_file -I signer_identity
                  -n namespace -s signature_file [-r krl_file] [-O option]
Step 2: Generate new SSH key
In the Terminal, type the following command to generate a new SSH key
ssh-keygen -t ed25519 -C "your_email@example.com"
Replace "your_email@example.com" with your actual email address. You can also use RSA keys if needed as follows:
ssh-keygen -t rsa -b 4096 -C "your_email@example.com
Then, follow the prompts on the terminal.
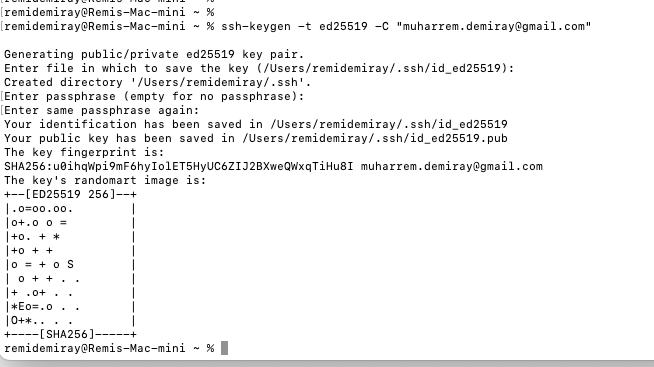
Hit “Enter” if you are ok with default location of the SSH key files.
Enter a password twice, or hit “Enter” twice if you don’t want password on these private-public key pairs
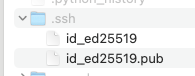
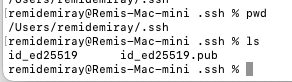
Step 3 [Optional] : Locate your ssh key files
Go to your “Home” location either on Finder or on your terminal (cd ~)
If you are using “Finder”, press “Command + Shift + .” to see invisible files/folders one of which is ~/.ssh
If you are using terminal, run “ls -a” to see all files/folders on home location one of which is ~/.ssh
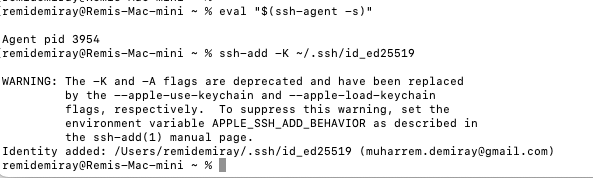
Step 4: Introduce your brand new private SSH keys to SSH agent
Start the ssh-agent in the background by typing:
eval "$(ssh-agent -s)"
Add your SSH private key to the ssh-agent:
ssh-add -K ~/.ssh/id_ed25519
If you used RSA keys during key generation step, replace id_ed25519 with id_rsa.
Step 5: Introduce your brand new public SSH keys to your Github profile
Before proceeding further, make sure to copy your public key.
You can either use the following terminal command to copy the content of your file that keeps your public key. After you run the following command, your public key will be available in clipboard and waiting for your “Command + V” command to paste
pbcopy < ~/.ssh/id_ed25519.pub
Alternatively, you can go to this file via Finder app and open it with any text editor you want and just copy the content.
- Go to github.com and log in with your credentials
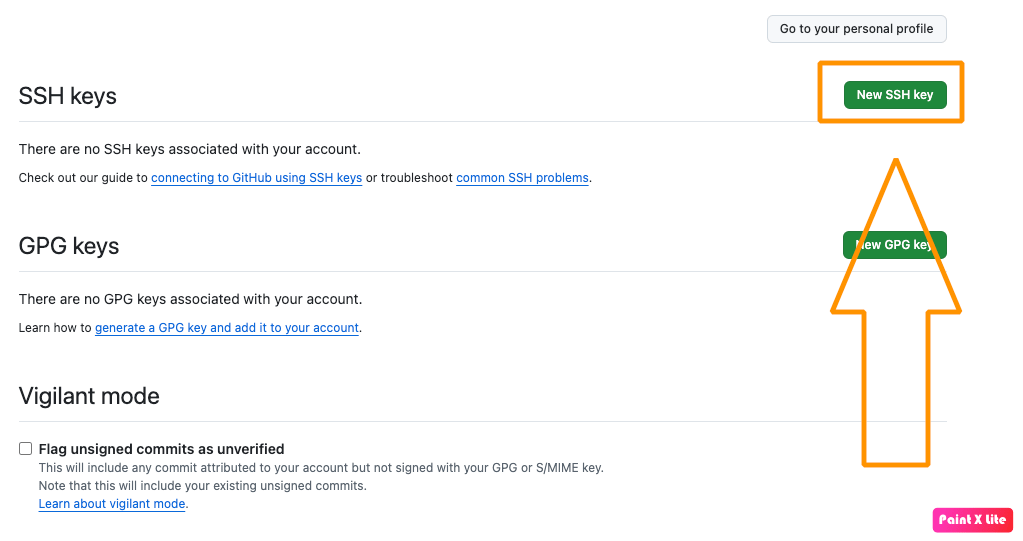
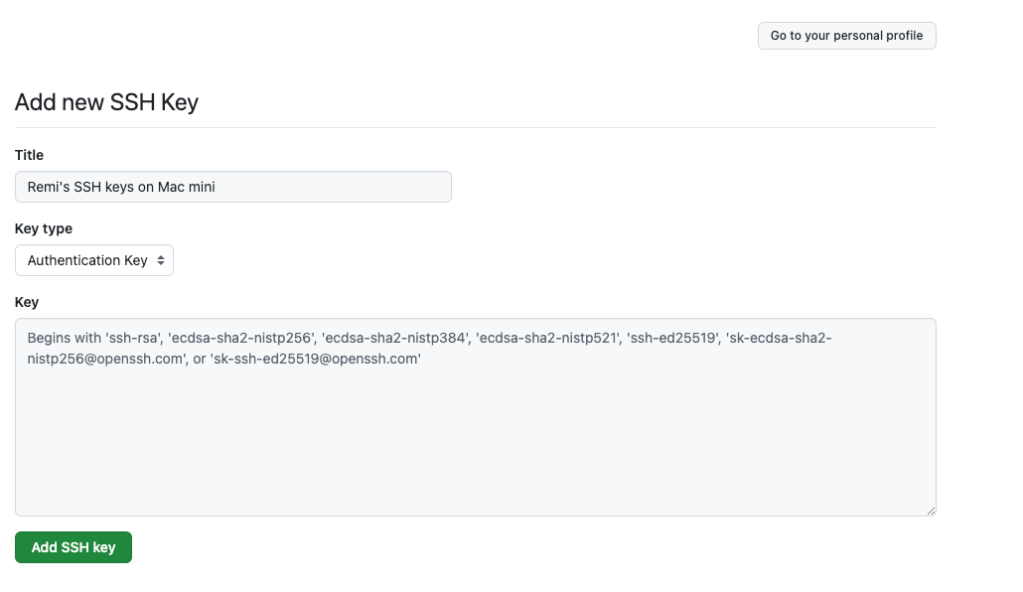
- Go to your Profile Settings and click on “SSH and GPG keys” menu item
- Click on “New SSH key” button
- Fill in “Title” and public key and hit “Add SSH key” button
That’s it! Your SSH public key is now added to your GitHub profile, and you can use it for authentication.
The following screenshots are added for visual assistance while doing this step.

Step 6 [Optional]: Seeing SSH keys in action
Well, you’ve completed all the necessary steps to add private/public SSH keys to your local computer and your git repo server (Github) respectively.
Now it is time to put it into test!
A quick test would be cloning one of the public repos on Github on your local computer.
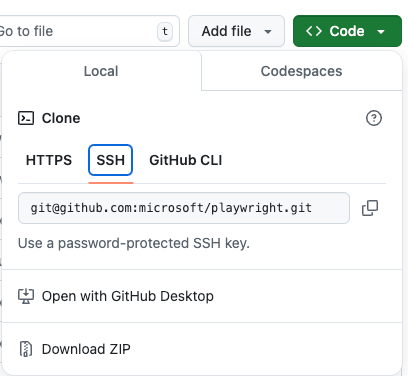
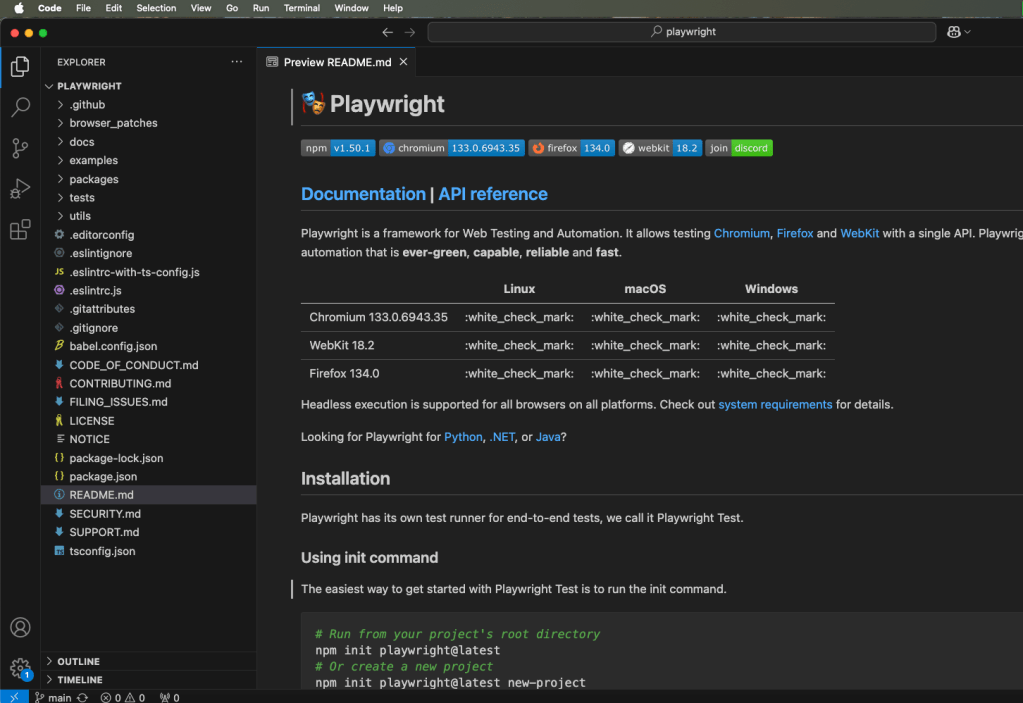
For this experiment, I will clone playwright repo
- Go to Playwright repo on Github
- Click on “Code” and pick SSH option and copy SSH link
- Open your terminal and run the following command to clone playwright repository
git clone git@github.com:microsoft/playwright.git
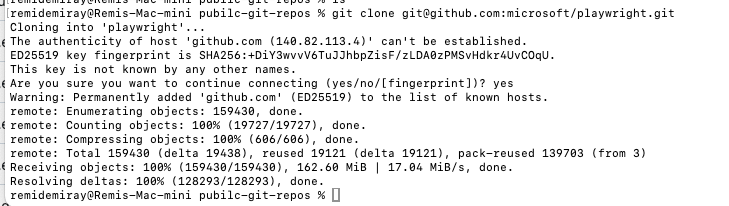
If this is the first time you are cloning any repo from Github, you might get a question about the authenticity of the host (Github). You can type “yes” and hit enter. For the subsequent Github interactions (git clone/pull/push), one should not get the same prompt.
You can go ahead and also open up recently downloaded project in VSCode.


![[Tiny-Tech-Tip] Locking Mac computers quick: Command + L](https://remidemiray.com/wp-content/uploads/2025/02/before-after-command-lock.png?w=545)


![[Master Thesis] A Novel Method For the Quantification of Coronary Artery Stenosis: A 2D QCA SYSTEM](https://remidemiray.com/wp-content/uploads/2025/01/gui.jpg?w=548)

Leave a comment